

Product Description
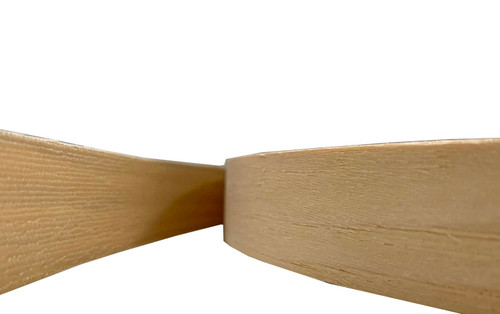
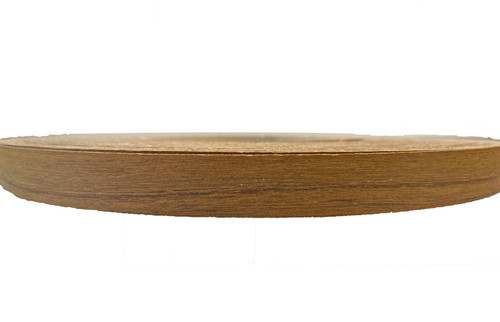
Premium real Cherry wood veneer edgebanding that matches solid Cherry or Cherry veneer panels. Ideal for finishing exposed edges on cabinetry, furniture, countertops, shelving, and millwork where a natural Cherry appearance and consistent grain continuity are desired.
Key features:
- Real Cherry veneer face for authentic color, grain, and finish options.
- Available widths: 7/8" (22 mm), 1" (25 mm), and 2" (50 mm) to suit thin to thicker edge applications.
- Sold by 25-foot sections or by full rolls:
- HM (hot-melt) glue backer full roll: 250 ft
- Paper/felt backer full roll: 500 ft
- Multiple-unit purchases: we supply the longest possible continuous length; contact us if you require specific cut lengths.
- Backer options: Felt/Paper Backer (requires separate adhesive) and Hot Melt Glue Backer (pre‑glued).
What it’s for:
- Cover and protect raw or exposed panel edges on plywood, MDF, particleboard, solid wood panels, and laminates.
- Provide a seamless, continuous Cherry appearance from face to edge for cabinetry, bookcases, countertops, furniture, doors, and trim.
- Ideal for repairs, custom millwork, or finishing shop-produced components for a high-end, consistent look.
Backer types & application overview:
- Felt / Paper Backer (paper-backed)
- Best when you want to use a separate contact adhesive or when you need a longer roll length (500').
- Adheres to most surfaces when proper surface prep and adhesive are used.
- Application tip summary: roughen very smooth surfaces with light sanding; apply thin, even coat of contact cement to both the substrate edge and the edgeband; allow cement to become tacky (a few minutes), then press edgeband onto the edge; smooth out air bubbles by pressing firmly along the length.
- Hot-Melt Glue Backer (HM / EVA)
- Pre-applied high-quality EVA hot-melt adhesive — no additional glue required.
- Convenient for quick iron-on application; full rolls are 250'.
- Application tip summary: roughen very smooth surfaces with light sanding; protect veneer by covering with a cotton cloth before using the iron; heat with an iron in a continuous circular or sweeping motion until adhesive activates and grabs; avoid dwelling too long in one spot to prevent scorching.
Detailed usage & finishing tips:
- Surface prep: ensure edges are clean, dry, and free of dust, oil, or wax. Sand glossy or very smooth substrates lightly (120–180 grit) to promote adhesion.
- Cutting: for clean ends, score the edgeband with a sharp utility knife or use a fine-tooth saw; trim flush with a sharp block plane, edge trimmer, or a laminate trimmer.
- Iron-on technique (for hot-melt): set iron to medium heat (no steam), cover veneer with a cotton cloth or scrap, move iron steadily back and forth until glue melts; immediately press with a roller or a clean block to set bond.
- Contact cement technique (paper backer): apply thin, even coats to both surfaces; let both dry to tacky; align and press; wipe away excess with solvent recommended by the adhesive manufacturer.
- Tension & joint management: when working long runs, work in manageable lengths to avoid misalignment. If a seam is required, align grain direction for best visual match and butt ends carefully, then trim and sand seam smooth.
- Finishing veneer: Cherry will darken and deepen in color with exposure to light. To achieve uniform color with adjacent panels, consider applying the same stain, sealer, or finish to both the face and the edgeband after installation.
- Sanding & finishing after application: use fine 220–320 grit for light smoothing. Avoid heavy sanding that will remove the thin veneer face. Use water-based finishes carefully (test first) because they may raise the grain.
- Repair tip: loose spots can often be reactivated with a heat iron (for hot-melt) or with additional contact cement for paper-backed banding.
Storage & handling:
- Store rolls flat or on a rack at room temperature away from direct sunlight and extreme humidity.
- Keep adhesive-backed surfaces protected until ready to use.
- Allow product to acclimate to shop temperature for several hours before applying.
Ordering notes:
- Choose width to match the edge thickness plus an allowance for trimming.
- If you need a specific continuous length, please contact us prior to ordering.
Why choose real Cherry veneer edgebanding:
- Authentic appearance with natural grain and tone that matches solid Cherry and Cherry veneers better than printed or PVC edgebanding.
- Thin real-wood face accepts stains and clear finishes for a seamless match.
- Economical way to finish exposed edges while maintaining a high-end, natural wood aesthetic.